Indoor cycling – Proper form
In my last post about indoor cycling, I discussed what you could expect from an indoor cycle class. I want to follow up with one of the most important parts of an indoor cycle class, your bike set up and form.
In my classes, I always ask new cyclists to arrive 5 to 10 minutes early so we can find the right bike set up and discuss proper cycling form. If you are new to indoor cycling, plan to arrive early to your first few classes so you can have this discussion with the instructor. Having proper bike set up and form will ensure you have a comfortable, efficient, and safe workout. Below is an overview of these important considerations.
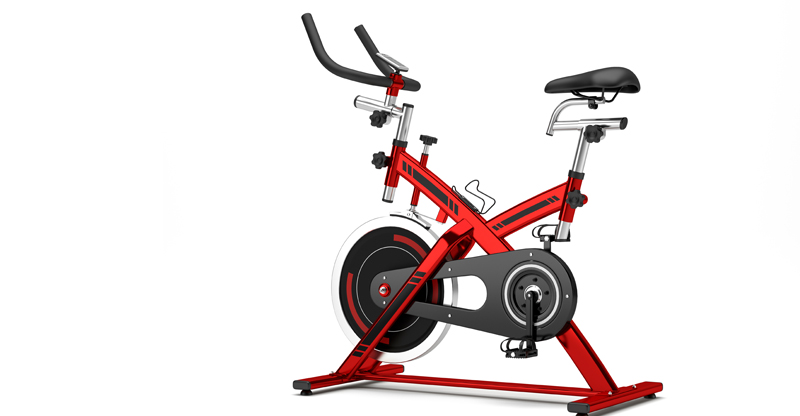
Locate the adjustment points
- Most bikes have anywhere from 3 to 4 adjustment knobs, including:
- One at the front for the handlebar height.
- One under the handlebars for adjusting them forward and back.
- One at the seat to move it forward and back.
- One at the back of the bike to move the seat up and down.
Set up seat (saddle) height
- This is where you will adjust how high your saddle is.
- Stand next to the bike, lift up your leg (90 degree bend at the knee), and line the seat to the raised leg (it should be level with your hip bone).
- Get on the bike with hips level and sitting on the widest part of the saddle.
- If there is a foot strap, you want it at the widest part of the foot and tightened.
- Start to pedal slowly. Think of the pedal stroke as a clock to check the height (12 at the top, 3 at the front, 6 at the bottom, and 9 at the back).
- Stop the leg at the bottom (or the 6 o’clock position) with a flat foot, and you should have a slight bend at the knee to achieve a 25- to 35- degree angle.
Adjust the handlebar height/position
- Next you need to adjust the handlebar height and distance. I recommend setting the seat height first so you can use it as a guide for the handlebars.
- Start by aligning the handlebars with the height of your seat and see where adjustments need to be made.
- When on the bike, you want a slight lean forward, shoulders and elbows relaxed when your hands are placed on the handlebars (position 1).
- You also want a neutral spine while you are hinging from the hips.
Seat fore-and-aft adjustment
- Decide if the saddle needs adjusted forward or backward from the handlebars.
- Get on the bike with hips level and sitting on the widest part of the saddle.
- Stop the pedal at the 3 o’clock position and check that the top of the knee is straight in line with the center of the pedal or widest part of the foot (vertically).
- If it is not, you may need to move the seat forward or back.
Pop in and lock knobs tight
- Finally, you want to make sure your knobs are locked in place before beginning your workout. Most of them have small holes into which the peg pops, so make sure you hear a click if they do. Others have an adjustment that has to be tight; give it a big turn to tighten.
Posture, form, and body position
- When on the bike, you want to keep what’s called a neutral spine, which means you are engaging your core and your diaphragm with a slight arch in the low back.
- Hinge at the hips and maintain a neutral position while sitting. Also avoid swaying of the hips as you ride.
Other adjustments may need to be made if you have an injury or special condition or are pregnant. Always check with your instructor, as some bikes have different adjustment recommendations. The ones listed here are for SPINN or Keiser bikes. I have also included a video for each of those types of bikes below.
Keiser Bike set up: www.youtube.com/watch?v=a1aPQZZY334
SPINN Bike set up: www.youtube.com/watch?v=7fzWHow-3zc
Cycling is great workout, and proper form is essential for success. Use this guide for getting started and always ask your instructor for additional recommendations based on the type of bike you are riding, the class, and your goals.
References:
Keiser: www.youtube.com/watch?v=a1aPQZZY334
SPINN: www.youtube.com/watch?v=7fzWHow-3zc
SPINN Life Blog: http://spinlife.spinning.com/
Keiser Spinn Bike set up: http://manuals.keiser.com/downloads/exercise_bikes/M3-M3+-User-Manual.pdf


